The Building Time Line, 1992 to 1996 in Pictures

I moved to Redding in October of 1991 after being transferred from the Cal Trans Shop in San Luis Obispo, CA. Prior to the move, we had leveled a spot for our travel trailer and put in a septic system so it was mostly just a place to sleep at night. The Redding shop was larger  than San Luis but I moved all of my tools and other belongings into the Welding Shop and started work just as though I had been there for years. The welding shop was way at the rear of the building and closed off from the other bays.  I was the only one working back there.

There was no water or electric to our trailer and I can remember taking two 5 gallon containers with me each day to work and filling them with water. One of the first things I did was to set up a generator set so that I could have lights inside the trailer at night. The trailer had a very small propane refrigerator and propane stove and oven.  It also had a propane heater so in a few days I was able to prepare some meals and watch a small TV.

Helen remained at Huer-Huero Road as the house there had not yet sold. As I recall, we began moving all of our belongings from Huer-Huero road to a storage facility in Redding over the Christmas Holiday.  We made 3 trips in 3 days using  U-Haul's largest truck. I was dead tired when it was all over.

shop

Arial View of the Cal Trans Shop in Redding

When the house sold in San Luis Obispo, I had to go down to sign the escrow papers. All of the appliances stayed with the Mobile home so after the signing, Helen returned to Whtimore with me. At the time we still had no electricity except for a small 2500 watt generator set and we decided to get a bank of batteries and an inverter so that we could watch TV at night without the sound of the generator running.

inverter

Here you can see the batteries, the inverter, and a volt-ammeter so that I could monitor the batteries

When we were still at Rinconada, I installed a platform on the rear of our Travel Trailer so that we could haul additional cargo.  I made a box with a hinged top and put it on this platform so that I could keep the inverter and equipment out of the weather. I used a couple of benches and a piece of plywood to cover the generator set

generator set

The generator set and the Inverter Box

 In February of 1992, I bumped my elbow on a vise at Cal Trans and it swelled way up so they gave me time off to go to the doctor. It was a new doctor that I found in the yellow pages and since I had never been to him before, he suggested a complete physical which he proceeded to do right then. Next thing I know, he had me on the treadmill checking out my heart and he told me I had a very serious heart condition and that I needed to go directly to the hospital. I told him that I would have to contact my wife first and that meant going home as we did not have a telephone at the time. I also contacted Cal Trans to let them know what was going on and the very next day I was in the hospital being prepped for Heart Surgery.

I had a 5 way heart by pass and this delayed the start of the house project by several months. I was in the hospital about a week and in this picture, I had all of the tubes and wires disconnected and I was waiting for the lady to show up with the wheel chair to take me down to the car.

hospital

Waiting for my release papers and a wheel chair

walk

When we arrived, I walked up through what is now Allyson's garden and into the trailer.

 That first night I was unable to crawl up into the bed as it was too high so I slept in my rocker chair that came with the trailer. The next day, we bought one of those electric chairs that you can use as a bed and it would also bring you to a stand up position.  It was way too wide to fit in the trailer door so Gordie and the delivery guy extended it to the stand up position which made it much longer but thin enough to bring through the door sideways. I was about two weeks in that chair before I was able to manipulate the bed. In six weeks the doctor gave me the ok to go back to work. Cal Trans did not want me to go back to work but I gave them the release from the doctor and there was not much else they could do to prevent me from returning. My job at Cal Trans was my main source of income.  I was 61 at the time and was eligible for Social Security in August of 1992 so I wanted to stay on until it was a bit closer to that date. I stayed on through May and then put in for retirement at Cal Trans. At the same time, I was able to apply for retirement through the Social Security Dept. and received my first check in Septmeber. 

It was about mid March before I was able to get up and about and on On March 27, 1992, Gordon Jr. helped me with and 8x8 add on to the travel trailer. Here you can see the two of us using the post hole digger to drill some holes for some short posts that we put in which would be the foundation for the add on.

traier drill holes

What follows next is a series of pictures that shows the construction process of the add on from start to finish

add on 2

 Putting in the Floor Joists

add on 3

The floor in and one wall up

add on 4

Framed and Roof On

add on 5

The black paper on and now the siding

add on 8

The completed trailer add on. It's still there today but the trrailer is long gone

Shortly after we arrived in Redding, we started searching for a trailer for Gordie to live in.  We found an Aljo Travel Trailer that was about the same size as ours and we set it up in the area close to what is now Allyson's grape vine circle.

He used a small 800 watt generator set so he was entirely independent from us.  He set up a tv antennae, canvas awning, picnic table, soda cooler and he was ready to go.

aljo

Gordie's Travel Trailer

The area where the house was to go was overgrown with Manzanita mixed in with oak and pine trees, We spent many days in late 1992 and early 1993 taking down the trees and clearing the Manzanita

In the picture below, you can see that Gordie cut a "V" in this huge oak tree and a straight cut from behind so all that is holding it up is about 2 inches in the center of the tree. We wanted it to fall in a particular spot so we pulled our tractor winch cable up about 15 feet using a rope to get the cable wrapped around the tree.


falling oak

Gordie and me securing the winch cable to the tree

Here you can see that the cable is taut and we are about ready to take the tree down

cable taut

Gordie is on the tractor pulling and I'm watching

When the tree hit the gound, it sent up a huge cloud of dust and I had to turn around to keep it from getting in my eyes

dust

Oak down in a puff of dust


Whitmore, California 1991 to 2008


We were living on Huer-Huero Road in Creston, California when we once again decided to pick up stakes and move. Helen and I had gone in search of a place that we would like retire to.  Our plans were to look in Northern California and in Oregon.  We wanted to be away from the big cities so I contacted some realtors before hand and told them what we would like, a minimum of 5 acres, trees, a paved road to the property, and not many neighbors.

Our first stop was in Redding, California.  The realtor was a woman and she drove us north east about 35 miles to the town of Whitmore.  It was a 5 acre lot and fully wooded, just what we wanted.  The owners wanted 25K for it with 1500 down and they would carry the loan.  We accepted and that was that.

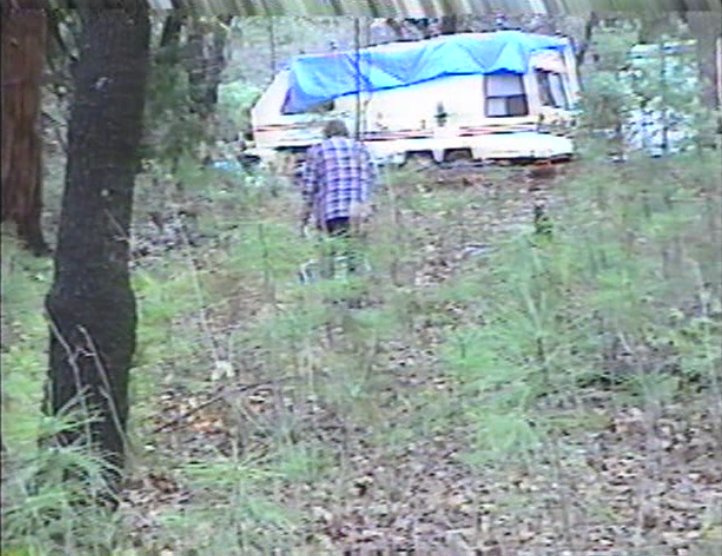
When we returned to Creston, I put in for a transfer at Cal Trans from San Luis Obispo to Redding, CA.  The process took about a year but in the meantime, we hauled our travel trailer up to Whitmore and on several occasions, we made the trip up north for the weekend.

travel trailer

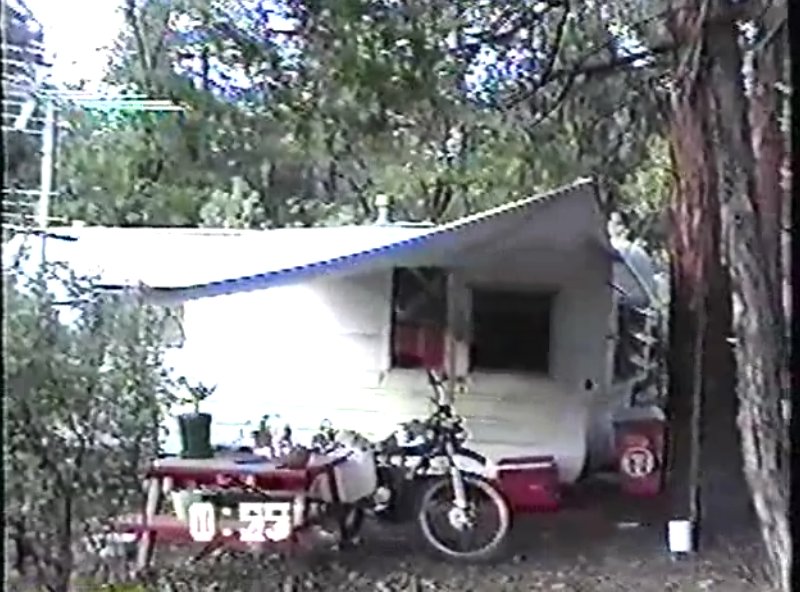
The above picture was not taken at Whitmore but it is the only one I have of the Toyota Dually and the 5th wheel trailer when it was fairly new. It was only 22 feet long and a bit cramped but it became our home from the fall of 1991 to the winter of 1993


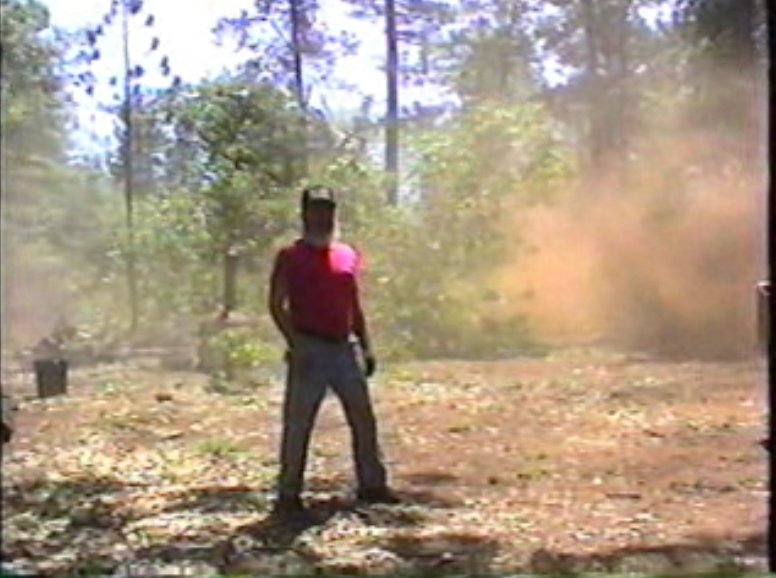
1992 April 5, clear brush and start putting in road


1992 May-October cut trees, clear brush, level lot for foundation


1992 Settle in Travel Trailer and read books on house building


1992 Finish Road and put down gravel


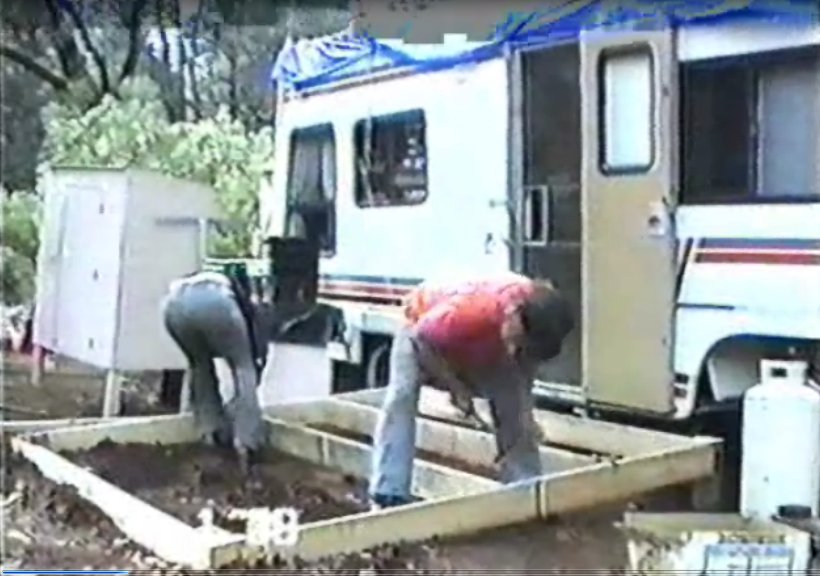
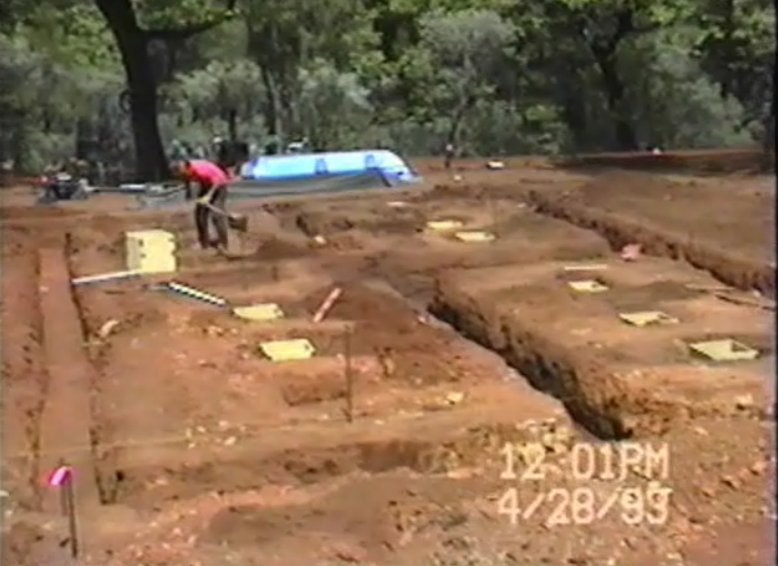
On March 20, the actual construction of the house got underway. I hired a local guy to come in and dig the trenches for the foundation. He was in and out in about 2 hours.

backhoe

Digging footing trenches for house foundation

The trenches were no sooner dug than we got some heavy rain and filled them to overflowing. One good thing came of this.  I drove in Metal foundation stakes at all 4 corners of the house and used the water as a giant level to pull string lines and this gave me a perfectly level foundation

flooded foundation trenches

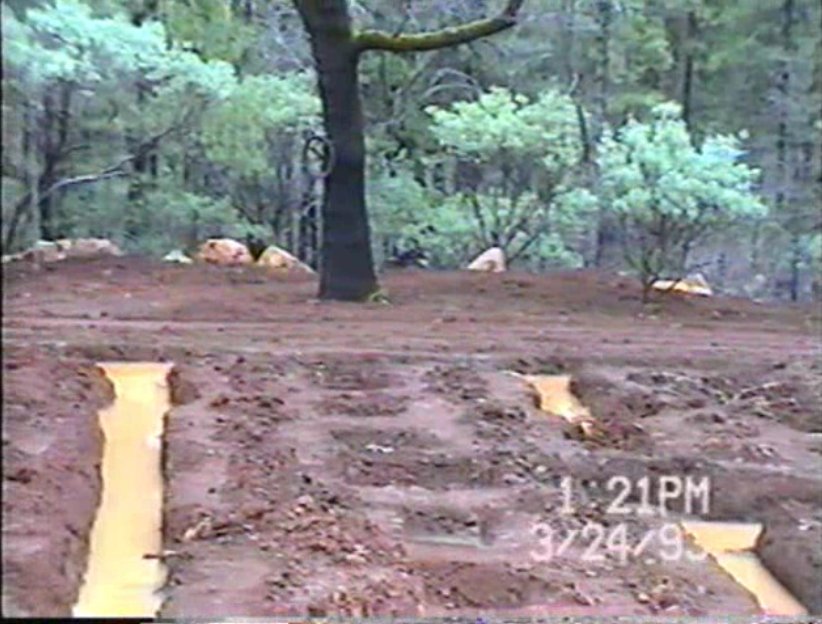
On March 24, 1993, the foundation trenches were full of water

On March 31, 1993 the first load of construction lumber arrived for the house. It came on a tilt bed truck and the driver was able to place the entire load on 2x6's placed under the load in strategic spots as he moved the truck forward.

wood arrives

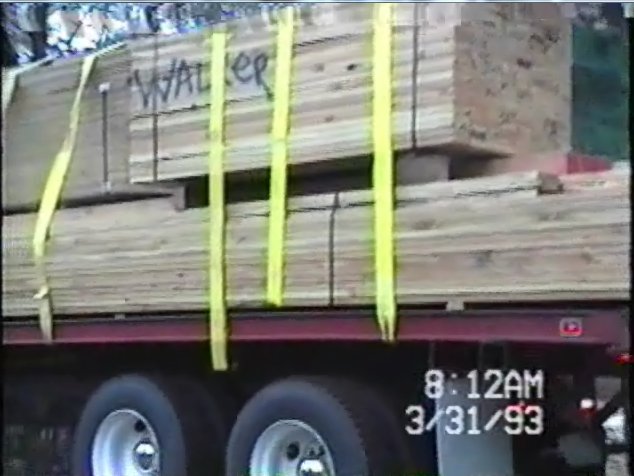
The first load of lumber arrives


wood arrives

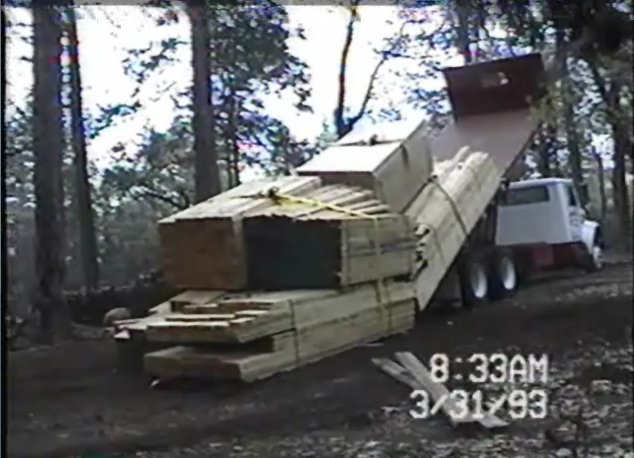
In about 30 minutes, the driver had the load on the ground

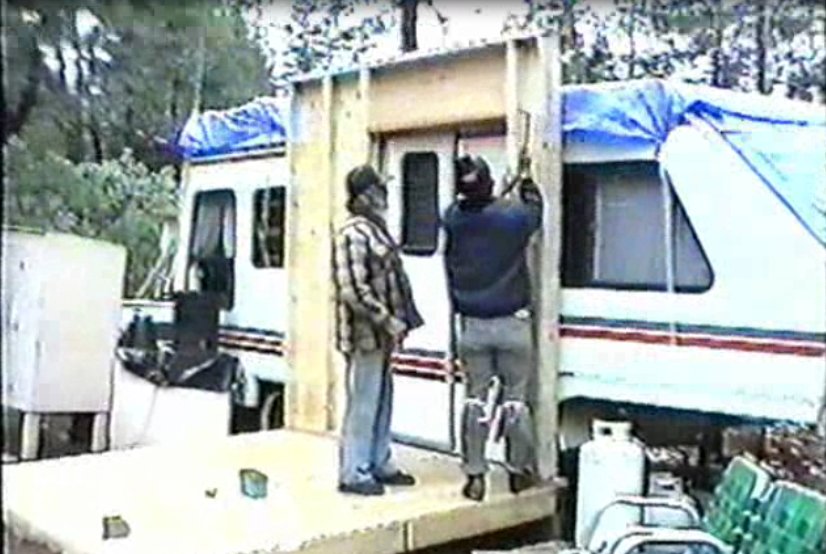
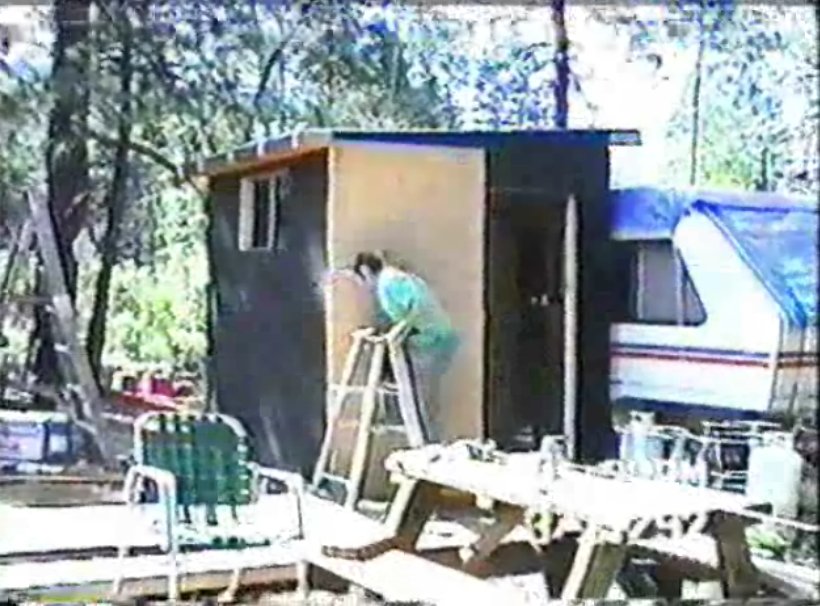
What we had to do next was put the wood under the tool shed awning to protect it from the weather.  What was important at this point was to stack the wood in an order that would allow the wood that would be used first to be on the top. A second load of wood came the next day along with all of the house insulation.  Gordie and I worked several days getting what would be used last stacked under the awning and further covered with a blue plastic tarp.

stacking wood

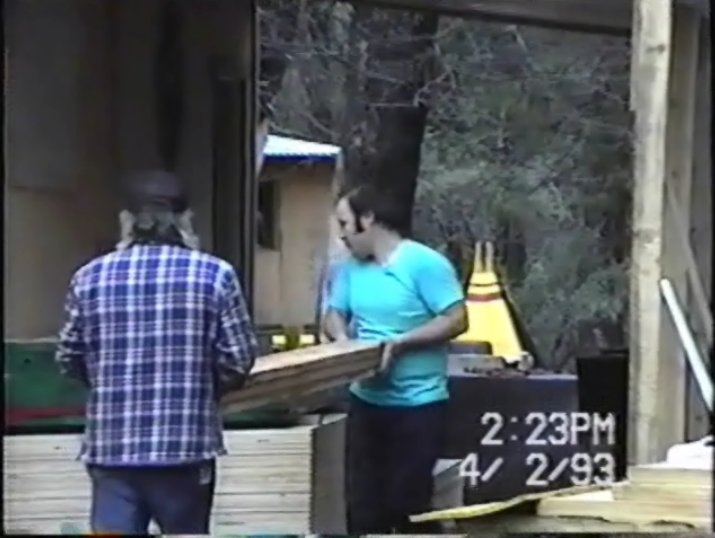
Stacking the wood under the tool shed awning

1993 April 28 to May 15 Build Foundation Forms

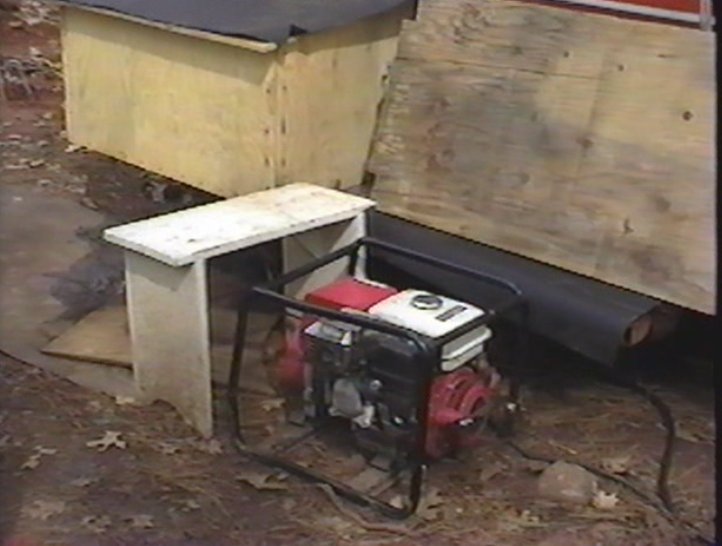
All of the wood that we used for construction of the foundation was placed under a tarp at the foot of the house. I also ran an electric extension cord from the generator set to the front of the house along with some saw horses so that we could cut the form wood to length as needed.

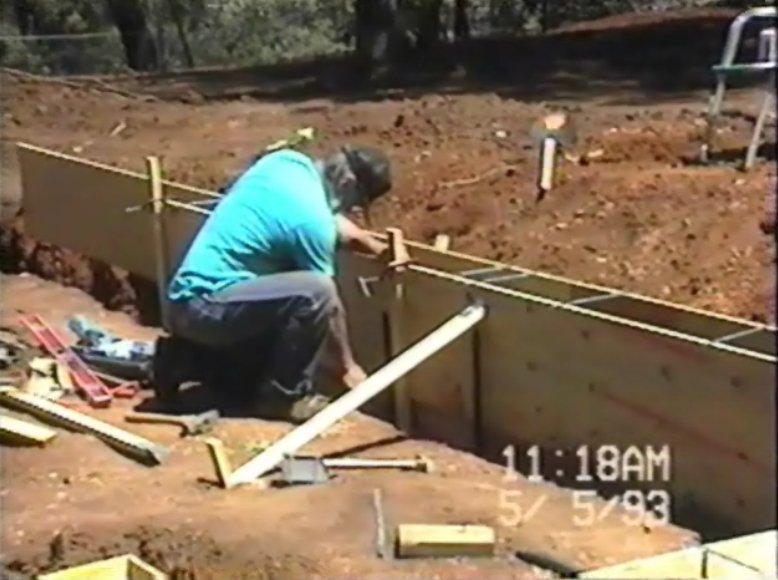
The next step in the process was to build the foundation forms and make boxes for the girder post blocks. The foundation depth, wall and footings are part of the house plans and must conform to specifications for the particular State/County that you live in. Here you can see my son Gordie putting in the boxes that will contain the box foundation cement.  Once the cement is poured into those boxes, the girder post blocks must be set in place on top of the concrete. These post blocks must be set on a string line so that the girder runs straight down the blocks.


boxes

Placing the girder support boxes

plan

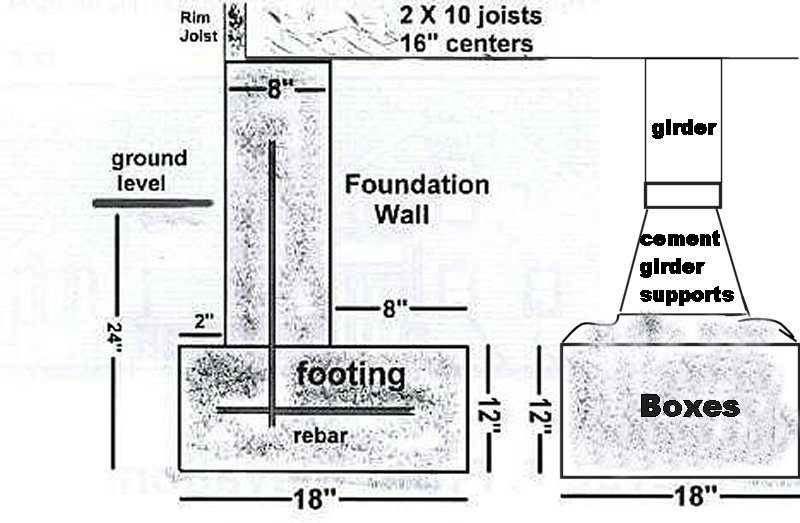
A cross section of the Foundation Wall, footing, boxes and girders


boxes

Pulling a string line to center the boxes from the front wall to the back wall

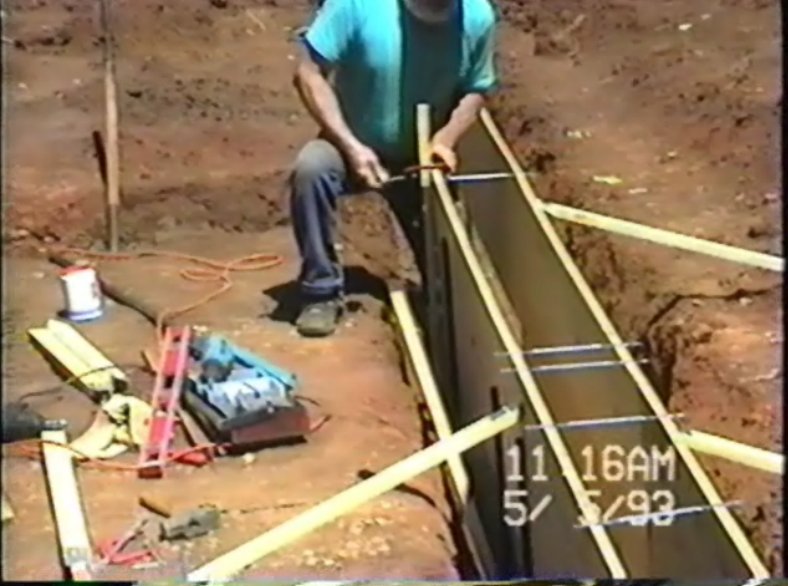
I used 3/4 plywood for my foundation walls and 3 foot metal foundation stakes to fasten the plywood in place. The concrete that gets poured into the foundation walls exerts tremendous force against the plywood so it is necessary to add slanted wood stakes from the top of the foundation wall to the ground. I drilled a 1/2' hole in most of the stakes and anchored them to the ground with 1/2' rebar. At the top, I used a 2"x6" flat Simpson Strong ties and a few short screws to attach them to the plywood.

In the next two pictures, I used two of the same wooden stakes and C clamps to level up the 8 foot pieces of plywood before attaching them to the metal stakes. Simpson also makes the metal straps that set  the plywood at 8" all along the top.

forms

Attaching the first clamp to the stake 

After I got the piece of plywood attached to the verticle stakes with C Clamps, I used a level across the top for the final adjustment. In this picture, you can see that a used a piece of wood driven into the ground at the end of the slanted support stake but this proved to be unsatisfactory so I drilled holes and used rebar.

forms

Making the final leveling adjustment 

On the 8th of May, 1993, the forms were close to being done and I finished up a week later on May 15th. 

forms

Almost done with the foundation forms 


1993 May 18 Dig Trench from Electric Pole to House
1993 May 24 pour foundation concrete
1993 May 25 Removed wood and stakes from foundation
1993 May 27 PG&E installs utility poles and run electric to house
1993 May 31 Water Flooded inside and outside foundation
1993 June 3 Clean up foundation and get ready for main girders
1993 June Level and fill dirt inside foundation
1993 June 8 Dig Trench for 50 Amp service to Trailer
1993 June 11 Install sills and seal with Henry’s Cement
1993 June 12 Start Framing
1993 July 5 Install Ridge Beams
1993 August 23 Nail down roof plywood and trim roof Rafters
1993 August 25 Extend roof rafters on front wings
1993 August 29 Finish Front Eaves
1993 August 30 Finish Rear Eaves
1993 August 31 Finish plywood on roof
1993 September 6 Install Roof Paper
1993 October 4 Start Metal on Roof
1993 October 18 Install exterior wall wrap
1993 October 28 Complete exterior wall panels
1993 October 30 Final Inspection and ok to move in