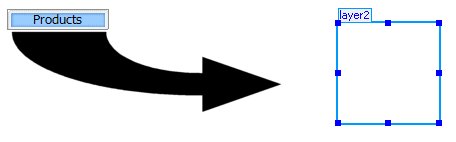
The above products navigation bar was made
using Front Page 2003 Layers and Behaviors.
While it is possible to create a complete drop down menu totally within front
page, it is not a simple click here type thing and you are done.
It involves layers, images, positive positioning, behaviors and a good
deal of patience in the process of creating it.
To grasp the concept of layers, just imagine having two or more sheets
of paper in your hand, the top sheet being visible such as what you see
on this page and the sheets under the top all having content but
invisible until acted upon by user action such as a mouseover, onclick,
mouseout etc; It is this type of action by the user that brings a
selected layer to the top, thus producing the drop down menu.
One of the more important aspects of creating such a menu is that images
used to create the menu are positioned absolute. What this means
is that the whole menu with all the layers underneath are positioned on
the page in a fixed position relative to the top left corner of the
page. This can complicate matters when viewed in various browsers
with different text sizes and
at resolutions above or below what you created the page at. The
only way to use layers successfully is to preview them in various
browsers and resolutions to make sure the amount of movement does not
adversely affect the layout of the layers.
Now lets see how to go about creating a drop down menu entirely within
Front Page 2003.
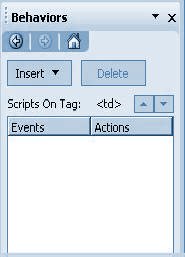
The two major tools that we work with
in creating layers are the "Layers and Behaviors"
windows that you see below.
To
open the layers window, click on Format>Layers.
At the bottom of each of these windows, you will see
either a Behaviors or Layers link allowing you to toggle
back and forth between the two windows. You
can also open the behaviors window by clicking on
Format>Behaviors
To
begin, open a new page within your web and give it a
name such as layers.htm. From there, we will
create a drop down menu.
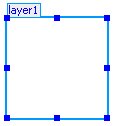
The
first step is to click on the "Insert Layers Icon"
 on the icon tool bar. This will place a layer
on the page similar to the one you see below.
on the icon tool bar. This will place a layer
on the page similar to the one you see below.
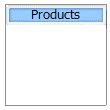
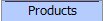
Next, place the cursor in the top left of the layer
and insert an interactive button. Any of the
buttons are ok to use so long as they look good in a
column. Use only a single button. To do
that, you will have to unselect the
pressed and hover under images when creating the
button. Name the button "Products". Once
you have done this, the layer should look like the
one below.
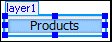
Next, highlight the
layer by double clicking the 4 way arrow on the
border and then use the sizing handles to reduce the
size of your layer down to the size of the button.
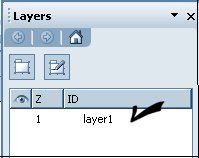
To
rename the layer, open layers window and
highlight and right click on "layer 1".
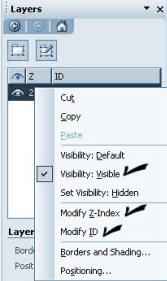
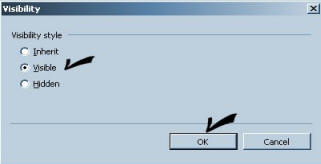
This
action will open the window you see below where you
can rename the layer to "products_main", set the z index
to 2, and set the visibility to "visible".
We want this button to be visible at all times.
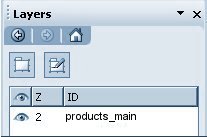
Once you have done this, the Layers window should
display as you see below and the layer itself should
look like the products button to the right.
Next, Highlight the Products Button Layer by
clicking on it with the 4 way arrow and then click
on "insert layer". This will display a new
layer directly over the Products button layer.
You can highlight this new layer and move it over to
the side for easier viewing until you are done with
it.
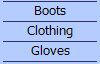
We can now add 3 more buttons into this
new layer naming them boots, clothing and, gloves. You will want to leave
this layer visible while you are working on it.
If you were working on a real page, the hyperlinks
would all be created at this time as well. You
would do the hyperlinks by highlighting each button
and linking to a new page.
Once you are done with all of the buttons and
hyperlinks, you would go back into the layers window
and change the name of this layer 2 to "products_sub"
and set the visibility to "invisible". At this
point, when you open your page, all you would see is
the Products button. What we have to do next
is to create some interactivity by making the drop
down menu visible upon hovering over the product
button. This is where the behaviors enters
into the picture.
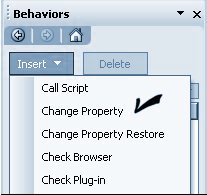
To
do this, highlight the Products button using the 4
way arrow and then go down to the bottom of the
layers window and click on behaviors. Once the
behaviors window is open, click on "Insert".
This will open another window in behaviors as you
see below.
A
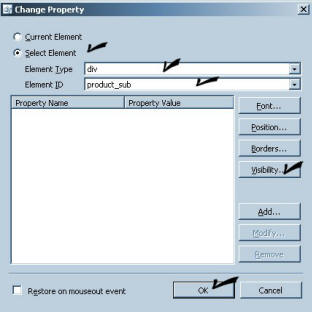
Click on Change Property and it will open the window
you see below. Several things need to be set
in this window. Click on Select Element and
then select Div and product_sub. Then go down
and click on visibility. Restore on mouseout
event should be blank and then click on OK.
B
This will open the window you see below where you
can set the visibility option.
C
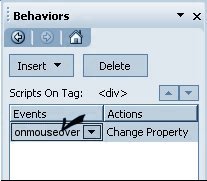
This will place onclick in the Behaviors window.
We don't want onclick so we need to change this drop down box in the
behaviors window to read "onmouseover"
D
You
can now test your page and when you hover over the
Products button, the sub menu should now be visible.
Obviously we don't want this menu to remain visible
so we need to return to the behaviors window and set
some properties to make it invisible upon mouseout.
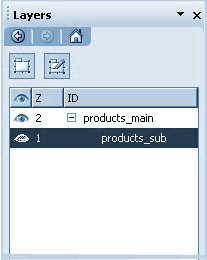
The
first step in creating the mouseout is to open the
layers window you see below and highlight
product_sub as you see below.
From this point on, you will do exactly as you did
above starting with step
A
The only thing you will change is to
make step C
"hidden" and Step
D
"onmouseout"